
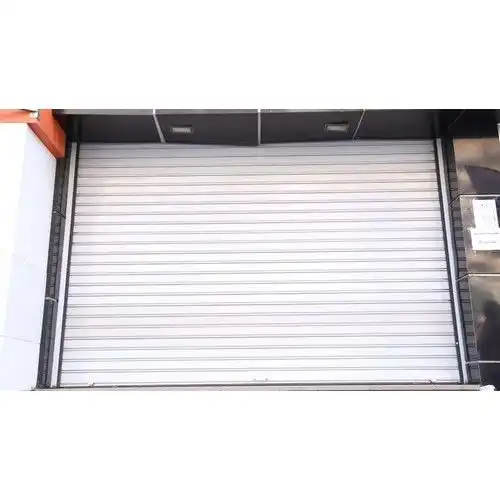
Installing automatic doors in Egypt follows six main stages: sending measurements and photos, a site survey, choosing the system and specification, preparing the opening and power supply, installation and adjustment, and finally testing, handover and training. Most delays and extra costs come from the preparation stages that get forgotten, not from the installation itself, so planning from the start saves both time and money.
This guide is for factory owners, warehouse operators, companies, retailers and building managers in Cairo, Giza, the industrial cities and the other governorates who are planning to install automatic doors, whether rolling shutters, automatic sliding glass doors, sectional doors or high-speed doors.
Stage 1: send measurements, photos and intended use
The first step is basic information that lets us recommend the right type and prepare a preliminary offer:
- Width and height of the opening, the distance from its top to the ceiling, and the side space available.
- Photos of the opening from inside and outside, and of the ceiling, sides and floor.
- The type of building and the opening's role: customer entrance, loading bay, opening between halls, garage.
- Traffic: how many times a day the door will open, and who passes (people, forklifts, vehicles).
- Special needs: insulation, visibility, access control, resistance to humidity or dust.
Send these through our site survey request page. The more accurate they are, the faster the survey and the closer the offer to the final cost.
Stage 2: site survey
The survey is the most important stage, because it reveals things photos cannot show:
- Accurate measurement of the opening, and checks that the sides are plumb and the floor is level.
- Fixing points: are the sides concrete, brick or steel, and can they carry the door and motor?
- Obstacles: beams, pipes, air-conditioning ducts, lighting, overhead cranes, sprinklers.
- Power: where the supply is, the voltage available, and whether a new line or a dedicated breaker is needed.
- Site conditions: wind direction, dust, humidity and access for equipment.
- Operating constraints: is the building in use, and must work be done at specific times?
Stage 3: choose the system and specification
Based on the survey, the right type and detailed specification are confirmed:
- Door type: a rolling shutter for security at a reasonable cost, a sectional door for insulation and sealing, a high-speed door for intensive traffic, or an automatic sliding glass door for commercial entrances.
- Motor and controller sized for the door weight and daily cycles.
- Control: push button, remote, motion sensor, or integration with an access control system.
- Safety devices: safety edge, photocells, anti-fall brake, emergency manual release.
- Options: an air curtain, vision panels, insulation, special finishes.
If you are still choosing between types, read our comparison of rolling, sectional and high-speed doors; for glass entrances, see our automatic glass door operator guide.
Stage 4: prepare the opening and the power supply
This is where many projects are delayed. Before the installation date, the following must be ready:
- The opening: final dimensions, plumb sides, and all building, plastering and painting work finished.
- The floor: level along the closing line and, for sliding doors with a floor guide, the guide position prepared.
- Frame or fixing points: if the survey calls for a steel frame or reinforcement, it is completed before installation.
- Power: a dedicated line with a suitable breaker run to the motor or control box position specified by the technician.
- A clear path: any obstacles, pipes or lights in the door's path moved.
Preparation specific to each door type
Rolling shutters
Enough space above the opening for the coil and motor, and strong sides to fix the guides along their full height. On wide openings, confirm that the barrel fixing points can carry the weight. Place the push button where the operator can see the whole door while it moves.
Automatic sliding glass doors
A beam or ceiling strong enough to carry the track and leaves, enough side space for the leaves when open, and a perfectly level floor along the line of travel. Decide the glass type and thickness early, because they set the leaf weight and the operator size. Sensor positions depend on how people approach the entrance.
Sectional doors
Ceiling space for the panel tracks roughly the height of the door, and enough headroom above the opening for the counterbalance system. Overhead cranes, lighting or pipes in the track path must be moved, or a different lift type chosen. At loading bays, door installation is coordinated with the dock equipment.
High-speed doors
Plumb sides for the guides, space for the motor box and curtain, and a suitable position for the sensors that detect forklifts or people. On external openings, check the wind exposure and choose a suitable model.
Who is responsible for what
Clear responsibilities from the start prevent disputes and delays. The split below is common; the final details are written in the offer:
| Item | Usually the client | Usually the supplier |
|---|---|---|
| Civil works (building, plastering, floor) | Completes them before installation | Specifies what is needed at the survey |
| Steel frame or reinforcement | As agreed | As agreed |
| Dedicated power line | Runs it to an agreed point | Specifies the requirement and position |
| Motor, controller and sensor wiring | None | Installs and adjusts |
| Site preparation and clear path | Before the installation date | None |
| Testing, training and handover | Responsible person attends | Carries out and provides instructions |
Stage 5: installation and adjustment
Installation covers fixing the guides or frame, fitting the curtain, panels or leaves, mounting the motor and controller, and connecting power, sensors and controls. The door is then adjusted: open and close limits, speed, hold-open time on automatic doors, and sensor sensitivity. The installation time depends on the door type and size, the number of doors and the site conditions, and is agreed in the offer.
Installing in a building that stays in use
If the factory or shop keeps operating, planning matters even more: schedule work at quiet times or during shutdowns, fence off and secure the work area from staff and forklifts, and arrange a temporary alternative entrance if the opening being fitted is the only one. Agreeing these points before work starts prevents lost production.
A simple project sequence
To plan properly, the project runs in this order: send the information, site survey, offer and approval, manufacturing or supply, and in parallel the client prepares the opening and power, then installation, then testing and handover. Any delay in site preparation delays installation even if the door is ready, so start preparation as soon as the offer is approved and confirm readiness before the installation team is sent.
Stage 6: testing, handover and training
Before you accept the door, make sure these tests are carried out in front of you:
- Repeated full open and close cycles with no stops or unusual noise.
- The door stops or reverses when it meets an obstacle.
- Photocells and sensors tested from every direction.
- Every control method tested: button, remote, card.
- Manual operation tested as for a power cut.
- Remotes, user instructions and warranty terms handed over.
- The responsible staff trained in correct use and emergency procedures.
Common mistakes that delay installation or add cost
- Ordering the door before building work is finished: dimensions change after plastering and finishing.
- Forgetting the power supply: the technician arrives to find no suitable supply, and commissioning is postponed.
- Ignoring overhead obstacles: pipes, ducts or a crane force a design change after manufacturing.
- An uneven floor: the door does not seal and leaves gaps for dust and insects.
- Unclear responsibility for civil works: the agreement must state who builds the frame, the reinforcement and the power line.
- Accepting the door without safety tests: any later problem becomes harder to resolve.
After installation: warranty and maintenance
Ask about the warranty period and what it covers, and agree a preventive maintenance schedule that matches the door's daily use. Regular maintenance keeps the door safe and extends the life of the motor and components. See our automatic door maintenance guide, and for any fault use the after-sales service page.
Frequently asked questions about automatic door installation in Egypt
Is a site survey necessary before installation?
Yes. The survey confirms dimensions, fixing points, power and obstacles, which decide the door type and installation method and prevent surprises on installation day.
Who prepares the power supply?
This is set in the agreement. Usually the client provides a dedicated power line to an agreed point, and the technician connects the motor, control box and sensors.
Can an automatic door be fitted to an old opening?
In most cases yes, once the condition of the sides, ceiling and floor has been checked. The opening may need a frame, reinforcement or minor works, which the survey identifies.
Do you install in all governorates?
Send the project location with the details through the contact page, and our team will confirm whether we can carry out the work and arrange the survey.
What should I check before accepting the door?
Full operating cycles, safety sensors and reversing, every control method, manual operation, and receipt of the user instructions and warranty terms.
Planning an automatic door installation? Send the measurements, photos and project location through our site survey and quote request page, and we will arrange the survey and next steps with you.